Showing posts with label framing. Show all posts

Thursday, March 12, 2009

The Care of Fine Art - Cleaning

Artwork requires periodic cleaning. An occasional dusting of a painting with a soft sable art brush will remove loose dust. Never use a cloth on a painting as it could pick up and chip the paint.

When cleaning glass or acrylic, use a damp, not wet, cloth and dry with a soft cloth. Never spray the glazing with a cleaner. It could run down the glazing and get inside the frame causing watermarks to form on the mat(s) and/or art, as well as encouraging mold and mildew growth.

Occasionally dust the back of your pictures and check the condition of the hardware and wire. Be sure that they are securely attached to the frame. Consult your framer if the hardware appears to be pulling out or is loose. If the hook(s) you have screwed or nailed into the wall seem to be loose, perhaps the artwork is too heavy for the hook(s) you have chosen.

  • Copyright, PPFA (Professional Picture Framers Association)

Wednesday, March 11, 2009

The Care of Fine Art - Light

Although art cannot be enjoyed without light, it is important to be aware that light can cause permanent damage to prints, drawings, and even paintings. Heat and light accelerate fading and discoloration of paper, but the amount of destruction depends on the intensity and duration of exposure to these elements. Invisible ultraviolet rays from sunlight and fluorescent lighting cause most damage.

Avoid hanging art in direct or reflected sunlight. Draw blinds or shades during the brightest part of the day to help prevent damage. Once fading occurs, there is no way to restore the colors. You might also consider rotating artwork. Remember, when handling a picture, use both hands on top and bottom, or both sides. If a picture is heavy, have another person help transport it.

If you must illuminate artwork, use a picture light with a low wattage incandescent bulb. Turn the light on only when you are viewing the piece. This will keep the heat and exposure to light at a minimum.

If fluorescent light cannot be avoided, as in most offices, the tubes should always be covered with special cylindrical sleeves that filter ultraviolet rays.

  • Copyright, PPFA (Professional Picture Framers Association)

Saturday, November 29, 2008

Framing a Sports Jersey

A very common question I hear people ask is: "How do I frame a sports jersey"?

In this post I am going to show you how to frame a jersey (it can be any jersey - rugby league jersey, soccer jersey, American football (NFL) jersey, or even a t-shirt) professionally. There are a few basic principles to follow and once you have mastered these, you can frame any shirt confidently anytime.

Archival Materials

In my opinion, the first and most important thing in framing jerseys is the choice of materials for framing. The fact that the jersey was sent to me for framing suggests that it has some value to the owner. To retain the value of the jersey it is a requirement to use conservation type materials. The mats must be either alpha-cellulose or cotton based. The foam-core must be faced with either alpha-cellulose or cotton based boards. The glazing used must have a UV protection coating. No staples should be used as these will rust in time.

Professional Mounting

Start by cutting a foam core in the shape of the jersey, or how you would like the jersey to be displayed. This will go inside the jersey to hold it into shape. Once in place, the jersey with insert can then be attached or mounted to the backing matboard of the desired colour. This can be done by manually sewing or in my case I use the attaching tool called Attach-Ez. A few (about 5 on top and a couple on each side) is all it takes to ensure a safe mounting. It's really very easy and quick once you get the hang of it. It probably takes me 10 minutes tops to do this.

It doesn't touch the glass!

After attaching the jersey to the backing matboard, we need to add spacer on the sides of the jersey to keep the jersey away from the top matboard and glass. It is important to have space between the jersey and the glass to protect the jersey from condensation on the glass.

A placque helps

Find a reputable engraver who can craft a title bar for the jersey. In my case the material used by my engraver is called gravolite. It looks like brass, (gold colour) but when computer engraved, it shows the black layer underneath. It is good as the contrast of gold on black is quite easy to read.

Finished product


The right moulding to use will have the right amount of depth to accommodate the frame assembly including the glass. Enough space must be available so that it will not be squashed up after placing framer's points.

Here it is the professionally framed rugby league jersey, but really you can use the same procedures highlighted in this article to frame NFL jerseys, hockey jerseys, soccer jerseys, basketball jerseys, etc.

Saturday, October 25, 2008

My tools for creating picture framing masterpieces

In this post I will list down all the major tools and equipment I am currently using to create my picture framing projects.

Mat Cutting
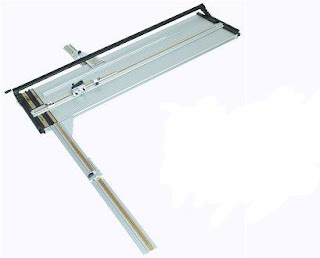
I use a 48" Keencut Ultimat Gold mat cutter. I have it installed in a custom built mat cutting table such that the cutting surface of the mat cutter is flush with the top of the table. The right hand squaring arm for this mat cutter is removable without using any tools, so I accommodated that too in the table design. I use it to cut a bevelled edge on 4-ply, and 8-ply mats as well as for sizing mats and foam boards. I got this mat cutter due to its 20 year guarantee, so I have peace of mind.

Timber Moulding Cutting
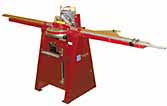
For cutting timber moulding to size, I use a manual Cassese CS55 chopper. This equipment has a very similar design to the Morso chopper, made famous by Morso of Denmark, are foot powered, they work through the use of a guillotine cutting principle. Unlike a saw, choppers do not produce sawdust, so it is perfect for a garage situation like I have. The finish produced by these choppers are very smooth, and they are ready to join immediately after cutting even without sanding it to size. They are a workhorse, and deadly accurate too. Just make sure the blades are super sharp.

Frame Joining
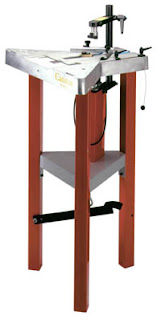
I use a Cassese CS88 Foot-operated underpinner for joining my frames. Same as my other machines, it is yet again foot powered so I don't need to purchase a compressor anymore, but more importantly, I don't really have space for it in the garage. When joining frames with the underpinner, I use a wood glue called Corner Weld, of all the glues I have used, I think this is the best, quick setting (only 5 minutes clamped) and doesn't dry rigid, it dries soft and pliable.

Multi-Material Cutting
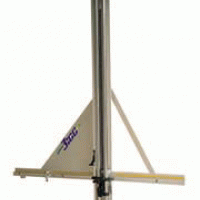
For cutting different materials such as mat boards, foam boards, glass, gatorboard, MDF, plastic boards and others, I use a Fletcher F-3100 multi-material cutter. Initially I thought that this equipment was not necessary when building a new frame shop, but after using it for a while, I should have bought it since day one. It saves so much time in cutting all these materials since it removes the need to mark the boards prior to cutting, and it also has production stops for repeat work, and it saves table space since it is wall-mounted.

Mounting and Laminating
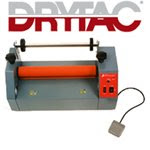
I use a Drytac Jetmounter JM26 Mounter / Laminator for mounting and laminating all prints. It is electric, but it's silent operation make it perfect for my garage setup. You don't even know it is turned on until the buzzer beeps when your hand is situated too close to the rollers.

Friday, October 24, 2008

Framing limited edition prints by Australian artist Reg Mombassa

I am currently framing several Reg Mombassa limited edition prints brought in by a new customer the other day. As they are all limited edition I suggested that conservation framing be used.

As the picture framer, you have to inform the customer about the options available, because more often than not, they are not aware that there is such as thing called conservation or preservation framing.

The limited edition prints are:

1) Fluffy the slightly pink kangaroo


2) Poplars and copses


3) Nocturne (etching)


4) Commemorative Tumulus


5) Hills Hoist


Of course from a layman's point of view, an item framed using conservation techniques and another with non-conservation methods will look exactly the same. Well, initially, that is. But I assure you, the difference will be seen in a few years. The colors on the exposed areas will fade as the accumulated effects of UV light takes their toll. The areas hidden under the mats turn brittle and yellowish.

The following is a description on the materials I used for framing the prints:

Crescent Rag Mat
Mats used for the job are all conservation grade. Rag Mats are made from cotton and not from wood pulp, which makes it free from lignin, the one responsible for the yellowing of paper.

Cotton Rag Foam Board
Foam boards also come in conservation variety. This project all used double matting spaced between foam boards, this gives the frame more depth.

Filmoplast P90 Conservation Paper Tape
The prints were hinged using this conservation tape. A pressure sensitive, white archival paper tape, long fibered and heavier weight than Filmoplast P. Recommended for repairing joints, hinging, and mending damaged edges of documents and book pages. Free from wood pulp and acid. Buffered with calcium carbonate, pH 8.7.

Tru Vue Conservation Clear Glass (with UV filter)
This glass has a UV coating on one side and comes in convenient sizes. The trick in cutting this glass is first determining which side has the UV coating. This is easy to do: grab an x-acto knife and score the glass on the very outside edge. The coating side is the one that scratches easily. This side will face the art. Make sure about this otherwise the coating will be scratched off every time the glass is cleaned.

Lineco Frame Sealing Tape
This tape was used to line the rabbet to further protect the artwork assembly from contact with the wood of the frame which is very acidic.

Saturday, October 11, 2008

Framing a cross-stitch the proper way (Lacing)

A new customer came in the other day bringing with her a nice cross stitch for me to frame. There are many picture framers closer to where she lives, but she chose to travel to my shop (which is further away) as she wanted me to frame it for her. After I talked to her, I realized that she recently found my company's website on google and one page discusses picture framing of cross-stitch the "proper" way.

Mounting
There are many different ways of mounting a cross stitch for framing. But what I always use is the process called lacing. It takes more time than pinning, stapling or even using attach-ez, but I think (I know) that it will stand the test of time. When lacing, make sure that the boards used are of the archival/preservation/conservation type. This will ensure that they will not have an adverse reaction to the cross-stitch in the passage of time.

Archival Boards
As I already mentioned, make sure that your framer uses the right kind of boards. Many mat boards and backing boards are of the decorative variety. These are what many picture framers use by default. Not me, I always use the archival variety (Crescent RagMat in particular), unless the customer decides otherwise.

Use of fillets
For this order, I will be using fillets to enhance the framing package. In my opinion the use of fillets makes a framing piece look about $100 more expensive than its actual value, that's why I always recommend this to my customers.

UV Filtering Glass
If you have gone through the trouble of using archival type mat boards, then it makes sense to use UV filtering glass (I use True Vue Conservation Clear) to ensure that the framing package is protected from UV rays which reacts with the framing package by making colors fade after a few years.

Finished Frame
Here is the finished frame, take note of the gold fillet used to enhance the presentation, the perfect choice of mat board colours, it simply looks beautiful.